
Slather too much coconut oil on fine hair and you'll spend the next three shampoos trying to wash out the grease. Apply too little to dry, coarse ends and you'll wonder why everyone else swears by hair oil while yours does nothing. The difference between limp, weighed-down hair and glossy, manageable strands usually comes down to technique, amount, and timing.

This guide walks you through exactly how to apply hair oil for your specific hair type, when to do it, and how to avoid the mistakes that leave most people frustrated.
Key Takeaways
- Start at the mid-lengths and ends, not the scalp — this is where hair is oldest, driest, and most prone to breakage.
- Use small amounts first (2–3 drops for fine hair, up to 5–8 for thick hair) and build up only if needed.
- Time it to your wash routine — pre-wash for deep conditioning, post-wash (a tiny amount) for shine and frizz control.
- Patch-test any new oil for 24–48 hours to rule out irritation or allergy before full use.
- Hair oil conditions and protects strands — it does not cure hair loss or regrow hair. See a dermatologist for medical concerns.
What Hair Oil Actually Does (and Doesn't Do)
Hair oil is a cosmetic product made from plant- or synthetic-derived oils that coats the hair shaft to reduce friction, seal in moisture, and add shine. Its core job is lubrication — smoothing the cuticle so strands slide past each other instead of snagging and snapping.
That's the honest, evidence-based version. It's not a miracle serum, and understanding the difference will save you money and disappointment.
Hair Oil Benefits — Realistic Expectations
Used correctly, the benefits of hair oil are real but cosmetic:
- Less friction, frizz, and breakage during brushing, detangling, and heat styling.
- Improved shine and softness as oil smooths a raised cuticle.
- Scalp comfort and moisture sealing — some oils help reduce water loss from the strand after washing.
One caveat worth repeating: these are grooming benefits. Oils are not a treatment for medical hair loss conditions like androgenetic alopecia or telogen effluvium. If you're shedding noticeably, talk to a dermatologist rather than relying on oil.
What Hair Oil Won't Do
The biggest myth is that oiling "makes hair grow faster." Hair grows from the follicle, driven by genetics, hormones, nutrition, and overall health — not by what you rub on the length. A well-oiled strand may break less, so your hair can retain more length over time, but that's protection, not accelerated growth.
Similarly, oil won't repair split ends (only a trim does that) or permanently change your hair texture. Be wary of any product promising dramatic regrowth — that's marketing, not dermatology.
Before You Start: Your Outcome and Prerequisites
By the end of this routine, you should expect smoother, shinier, more manageable hair with less frizz and easier detangling. This guide is for anyone with normal, dry, curly, or even oily-prone hair who wants a safe, repeatable method — no salon required.
Know Your Hair Type
Matching oil weight to your hair type is the single most important choice you'll make. Heavy oils on fine hair equal grease; light oils on coarse hair vanish without effect.
| Hair Type / Concern | Suggested Oil Weight | Example Oils | Amount |
|---|---|---|---|
| Fine / oily-prone | Lightweight | Argan, grapeseed | 2–3 drops |
| Medium / normal | Medium | Jojoba, sweet almond | 3–5 drops |
| Thick / coarse / dry | Heavier | Coconut, castor blend | 5–8 drops |
| Curly / high-porosity | Sealing | Shea-based, castor | Section by section |
Porosity matters too. High-porosity hair (often curly or color-treated) absorbs oil quickly and benefits from richer, sealing oils. Low-porosity hair resists penetration, so lighter oils applied to damp hair work better.
Patch Test First (Safety)
Before applying any new oil all over, do a simple patch test. Apply a small amount to the inside of your elbow or behind your ear, then wait 24–48 hours. If you notice redness, itching, swelling, or irritation, don't use it.
This matters most with oils that contain added fragrance or essential oils, which are common allergens. If your scalp becomes itchy, flaky, or inflamed after use, stop immediately and consult a pharmacist or dermatologist.
Tools and Materials You'll Need
- Your chosen hair oil, matched to your hair type
- A wide-tooth comb
- Sectioning clips (2–4)
- An old towel or one you don't mind staining
- Optional: a dropper bottle or applicator for precise scalp application
- Optional: a bowl of warm water for gently warming the oil
How to Apply Hair Oil: Step-by-Step
Step 1: Choose the Right Amount
Always start small — you can add more, but you can't easily remove excess. Dispense a few drops into your palm using the amounts from the table above. For long hair, lean toward the higher end; for a chin-length bob, use less.
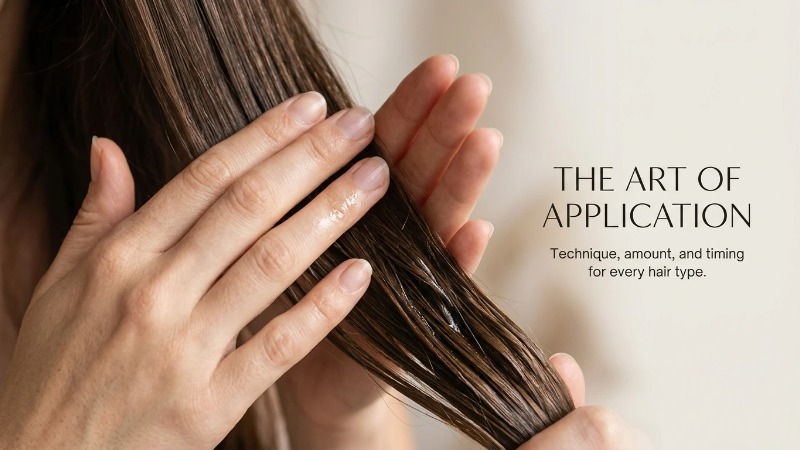
Rub the oil between both palms to warm and spread it before touching your hair. This prevents concentrated greasy patches.
Step 2: Warm the Oil (Optional)
Slightly warm oil spreads more easily and feels pleasant, especially for pre-wash treatments. Place the closed bottle in a bowl of warm water for a few minutes — never microwave oil directly, which creates uneven hot spots.
Test the temperature on your wrist first. It should feel warm, never hot, to avoid scalp burns.
Step 3: Section Your Hair
Clip your hair into two to four sections. Sectioning sounds fussy, but it guarantees even coverage so you're not dumping product on one spot while missing the rest. For thick or curly hair, this step makes a visible difference.
Step 4: Apply to Mid-Lengths and Ends
Working one section at a time, smooth the oil from about mid-length down to the tips. This is where hair is oldest and most damaged, and where oil does the most good. If you're oily-prone, keep oil well away from your roots.
Gently rake it through with your fingers so every strand gets a light coat, rather than concentrating it in one clump.
Step 5: Scalp Application (If Desired)
Applying oil to the scalp is optional and best suited to dry or normal scalps. Use a dropper to place small amounts along your part, then massage gently with your fingertips (not nails) for a minute or two to spread it and boost circulation.
Limit scalp oiling to once or twice a week. Overdoing it can leave residue and, in some people, worsen flaking or clogged pores.
Step 6: Comb Through and Style
Run a wide-tooth comb from mid-length to ends to distribute the oil and detangle at the same time. Start at the tips and work upward to avoid yanking. This step evens out coverage and reveals any spots you missed.
Step 7: Let It Sit or Rinse Out
For a conditioning treatment, leave the oil on for 15 minutes to an hour before shampooing. For deeper nourishment on dry hair, you can leave it overnight — protect your pillow with a towel or silk cover.
If your scalp is oily, shampoo twice to fully remove residue. As a leave-in finish on styled hair, use only a tiny amount on dry ends and skip the wash-out.
[Placeholder: before/after photo or step-by-step diagram]
When to Apply Hair Oil (Timing and Routine)
Timing changes the effect. Pre-wash oiling is a treatment; post-wash oiling is a finishing touch. Knowing which you want tells you when to apply hair oil.
Pre-Wash vs. Post-Wash Oiling
Pre-wash oiling means applying oil 30 minutes to overnight before shampooing. It conditions deeply and is ideal for dry, coarse, or curly hair. Because you wash it out, there's little risk of grease buildup.
Post-wash oiling means applying a very small amount to damp or dry hair after washing, mainly on the ends. It controls frizz and adds shine but must be used sparingly — this is the approach for fine or oily-prone hair.
Building a Weekly Hair Oiling Routine
Consistency beats intensity. A light, regular hair oil routine outperforms occasional heavy soaks. Use this schedule as a starting point and adjust based on how your hair responds.
| Hair Type | Frequency | Best Timing |
|---|---|---|
| Oily-prone | 1x/week | Pre-wash, ends only |
| Normal | 2x/week | Pre-wash or damp styling |
| Dry/coarse | 2–3x/week | Overnight, then wash out |
Pros and Cons of Regular Hair Oiling
| Pros | Cons |
|---|---|
| Adds shine and reduces frizz | Can weigh down fine hair if overused |
| Helps prevent breakage during styling | May leave residue or irritate the scalp if not rinsed |
| Improves manageability and detangling | Some oils stain pillowcases and fabrics |
| Inexpensive and versatile | Results are gradual, not instant |
Choosing the Best Hair Oil for Your Goals
The "best hair oil for hair growth" claims you'll see online are mostly marketing. Instead of chasing promises, choose oil based on your actual concern — dryness, frizz, dullness, or scalp comfort — and match it to your hair type using the earlier table.
Reading the Label: What to Look For
Flip the bottle and read the INCI (ingredient) list. Ingredients are listed by concentration, so the first few tell you what dominates the formula. A product labeled "argan oil" that lists a cheap filler oil first is mostly filler.
Watch for these details:
- Fragrance and essential oils — common irritants; if you have a sensitive scalp, choose fragrance-free.
- Comedogenic potential — heavier oils near the scalp can contribute to clogged pores or breakouts along the hairline in some people.
- Certifications — cruelty-free or organic labels reflect sourcing and ethics, not necessarily performance. Treat them as a bonus, not proof of results.
Common Mistakes and Troubleshooting
- Greasy roots? You used too much or applied too high. Cut the amount and keep oil to the ends.
- Hair feels heavy or flat? Switch to a lighter oil like grapeseed or argan, and use fewer drops.
- Seeing no benefit? Check that you're using enough for your length, applying consistently, and holding realistic expectations — shine and softness build over weeks, not one use.
- Scalp itch or irritation? Stop immediately, wash it out, and patch-test before trying anything new. Persistent irritation warrants a professional's advice.
Frequently Asked Questions
Can I leave hair oil in overnight?
Yes, overnight oiling is a popular deep-conditioning method, especially for dry or coarse hair. Apply it to the lengths, protect your pillow with a towel or silk cover, and shampoo it out in the morning. Fine or oily-prone hair may do better with shorter, 30–60 minute treatments.
How often should I oil my hair?
It depends on your hair type. Oily-prone hair typically needs it once a week, normal hair twice, and dry or coarse hair two to three times weekly. Start conservatively and adjust based on how your hair looks and feels.
Does hair oil help hair grow faster?
Not directly. Hair growth is driven by your follicles, genetics, and overall health, not by topical oil. What oil can do is reduce breakage so you retain more of the length you grow. For genuine hair-loss concerns, consult a dermatologist rather than relying on oil.
Should I apply oil to wet or dry hair?
Both work, depending on your goal. Damp hair helps lighter oils lock in moisture and is great for post-wash frizz control. Dry hair suits pre-wash treatments and richer oils. Avoid soaking wet hair, as excess water can dilute the oil and cause uneven distribution.
Can hair oil cause dandruff or acne?
It can in some people. Heavy oils left on the scalp may contribute to buildup, flaking, or clogged pores along the hairline, and comedogenic oils can trigger breakouts on acne-prone skin. If you notice these issues, apply oil only to the lengths and rinse scalp applications thoroughly.
Recap and Your Next Step
The core method is simple: pick an oil matched to your hair type, start with a small amount, apply it mostly to the mid-lengths and ends, comb it through, and time it to your wash routine. Patch-test anything new, keep your expectations grounded, and adjust as you learn what your hair prefers.
Here's your next step: choose one oil suited to your hair type from the table above, and try a single pre-wash application this week. Notice how your hair feels the next day, then fine-tune the amount and frequency from there. Small, consistent habits are what turn dull, brittle strands into hair that actually feels healthy.